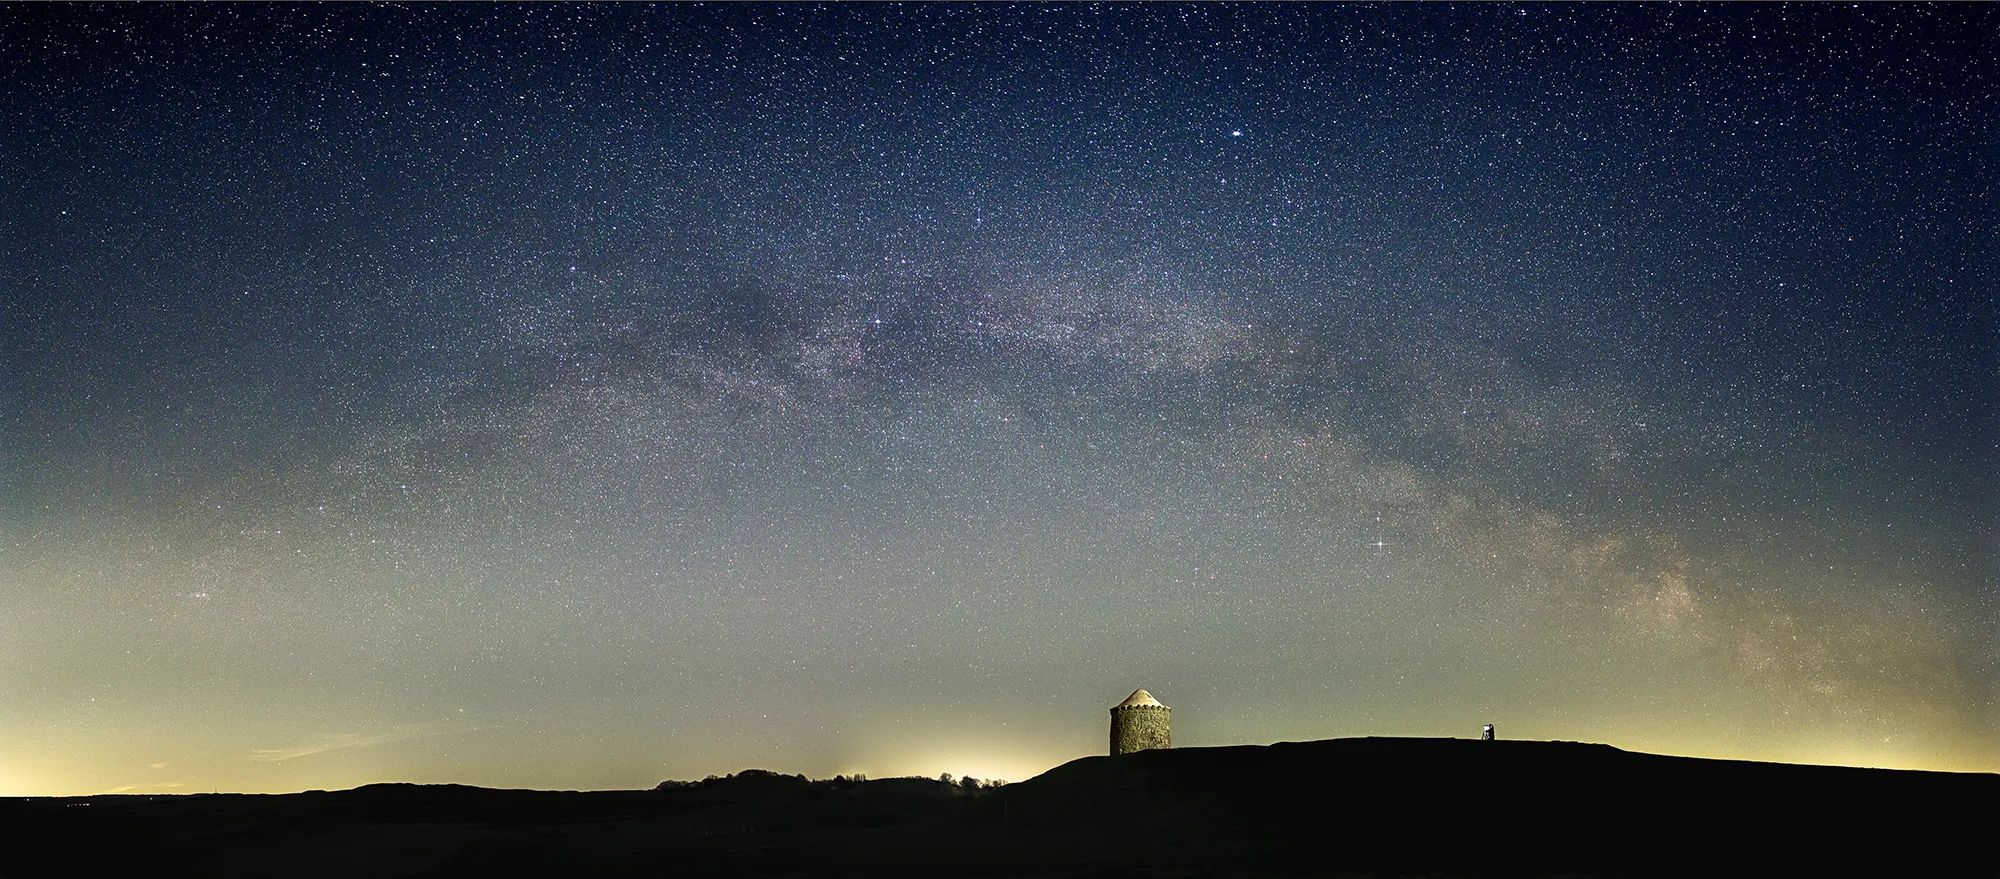
- MIlkyway Arch over Burton Dasset Hills
- Pentax K-1 Camera used:
- Samyang 24mm f1.4 Lens used:
- 24mm Focal length:
- f/2.5 Aperture:
- 15 Exposure time:
- 1600 ISO:
How to Capture a Milky Way Arch Photo
Capturing the Milky Way Arch is a rewarding but challenging experience. This guide will take you through my process step by step, from planning to final image processing. Whether you're a seasoned astrophotographer or just starting, you'll find useful tips to improve your results.

Planning and Preparation
Photographing the Milky Way requires careful planning. Here are the key factors to consider before heading out:
- Time of Year: The Milky Way’s Galactic Core is most visible between March and October in the Northern Hemisphere.
- Location: A dark sky is crucial, so find a location away from city lights. Light pollution can make the Milky Way difficult to see and photograph. - Tip: https://www.cpre.org.uk/light-...
- Weather Conditions: Clear skies are a must. Use apps like Clear Outside or Ventusky to check the forecast.
- Moon Phase: Aim for a new moon or a time when the moon is below the horizon. Tip: https://moonphases.co.uk/
- Star Tracking Apps: Use apps like PhotoPills or Stellarium to plan where the Milky Way will be in the sky.
For this particular shoot, I was in the light-polluted Midlands, on top of a hill, in freezing conditions at -2°C with a biting wind—so dress accordingly!
Step 1: Setting Up Your Tripod and Camera Gear in the Dark
A level tripod and camera are essential. Because you’ll be capturing multiple frames to stitch together, keeping the camera level ensures the final image aligns properly.
That said, setting up your gear in complete darkness can be tricky, but with the right approach, you can make the process much smoother. Here are some key tips:
Use a Headlamp with a Red Light
- A red light preserves your night vision, allowing you to see without ruining your ability to spot stars.
- Avoid using bright white light, as it can take your eyes up to 30 minutes to adjust back to the dark.
Find a Stable Surface for Your Tripod
- Ensure your tripod is firmly planted on solid ground to avoid movement during long exposures.
- On soft ground or sand, push the legs slightly into the surface for extra stability.
- If it’s windy, spread the legs wide and hang a weighted bag from the center column for added stability.
Use a Leveling Base or Bubble Level
- A level tripod is essential for stitching multiple frames together accurately.
- If your tripod doesn’t have a built-in level, use a small bubble level that attaches to the hot shoe of your camera.
Set Up Your Camera Before Heading Out
- Pre-set your camera settings (manual mode, ISO, white balance, etc.) before you leave home to minimize setup time in the dark.
- Attach your wide-angle lens and set it to manual focus so you don’t have to fumble with it later.
- Fully charge your batteries and bring spares, as cold temperatures can drain batteries quickly.
Focus Before It’s Too Dark
- Autofocus won’t work in the dark, so it’s best to manually focus while there’s still some light.
- If necessary, use Live View and magnify the screen to fine-tune focus on a bright star.
- Infinity focus isn’t always perfect on all lenses, so take a few test shots and adjust if needed.
Mark Rotational Points on Your Tripod Head
- If your tripod head has degree markers, use them to ensure even panning between frames.
- If not, mark points using small stickers or tape to help guide your rotation.
Use a Remote Shutter Release or Timer
- To prevent vibrations, use a remote shutter release or set your camera to a 2-5 second timer.
- If using a wired remote, ensure it’s secured so it doesn’t swing in the wind.
Keep Your Hands Warm & Use Touch-Sensitive Gloves
- Cold hands can make it difficult to adjust settings, so wear thin touch-sensitive gloves for fine-tuning adjustments.
- Keep spare hand warmers in your pockets to keep fingers nimble.
By following these steps, you’ll be able to set up faster, more accurately, and with less frustration, making your astrophotography experience much smoother.
Step 2: Capturing the Foreground
Since the Milky Way’s Galactic Core wasn’t above the horizon yet (rising in the South South/East), I had plenty of time to find my composition and take test shots. This waiting period is a great opportunity to refine your foreground composition.
Finding the Right Foreground Composition:
- Look for an interesting subject that complements the Milky Way, such as a lone tree, a rock formation, or an old building.
- Use a headlamp with a red light to preserve your night vision while adjusting your framing.
- Take a few test shots at high ISO and shorter exposures to quickly evaluate composition without waiting for long-exposure results.
- Consider leading lines in your composition, such as a winding path or a ridge, to naturally guide the viewer’s eye toward the Milky Way.
- If shooting near artificial light sources, be mindful of light pollution glare and adjust positioning accordingly.
Once you have a suitable foreground the following were the setting i then committed to using.
Foreground Settings:
- 9 frames at 24mm
- 20 sec per exposure
- f/2.5
- ISO 1600
- 15-30% overlap between frames
- Landscape orientation
These images were later stitched together using Photoshop, Lightroom, or PTGui.
Step 3: Capturing the Milky Way Sky
Now, onto the sky. The challenge here is that light pollution makes the Milky Way hard to see with the naked eye, let alone through a camera. So, some star knowledge and educated guessing were necessary.
Overcoming Light Pollution:
- Use a light pollution filter: A dedicated astrophotography filter can help reduce artificial light interference.
- Shoot in RAW format: This preserves more details in the image, allowing for better post-processing correction of light pollution effects.
- Take test shots at high ISO: Even if you can’t see the Milky Way with your eyes, increasing the ISO temporarily can help you locate faint details.
- Use star tracking apps: Apps like Stellarium, Sky Guide, or PhotoPills help identify where the Milky Way should be in the frame.
- Let your eyes adjust: It can take up to 30 minutes for your eyes to fully adapt to the dark. Avoid looking at bright screens during this time.
Sky Settings:
- 11 frames at 24mm
- 15 sec per exposure
- f/2.2
- ISO 1600
- Portrait orientation
- 15-degree rotation between shots

Finding the Milky Way Arch:
- The centre of the Milky Way Arch sits below the star Vega at this time of year. Using Stellarium or PhotoPills can help identify Vega.
- The Milky Way starts to the left of the constellation Cassiopeia, which looks like a ‘W’ made of five stars. Placing the middle star (Navi) towards the right of the frame ensures you capture the beginning of the Milky Way.
- From Vega (the centre) to Cassiopeia (left) took 6 shots (1+5) at 15-degree increments.
- To balance the frame, I took 5 more shots to the right from centre at the same 15-degree increments.
All of this was figured out in complete darkness, at -2°C, in strong winds, with failing eyesight—fun times!
Step 4: Stitching and Editing
Once I had all my 11 sky frames, I stitched them together in Photoshop, Lightroom, or PTGui.
Then, I merged the foreground panorama with the sky panorama in Photoshop. Both sections were edited independently but with consideration for each other.
Editing Process:
- Stitch the Foreground: Using your preferred software, align and blend the foreground frames to create a seamless panoramic image.
- Stitch the Sky: Similarly, merge the 11 sky frames, making sure to retain star detail and alignment.
- Color & Contrast Adjustments: Fine-tune the contrast, white balance, and colors to bring out detail in both sections while maintaining a natural transition between them.
- Noise Reduction: Use noise reduction selectively, preserving detail in stars while smoothing out unwanted grain in darker areas.
- Blending Foreground & Sky: Carefully mask and align the two merged images, ensuring a seamless transition at the horizon line.
- Final Refinements: Adjust the overall brightness, sharpness, and add any final touches like subtle dodging and burning to enhance depth.
After final refinements in Lightroom and Photoshop, the image was complete.
One day I might go to the trouble of producing a youtube video in my specific methods of editing, but for now there are various other photographers on youtube that can give you 90% of the editing better than I can explain here one such person is Mike Smith who is well worth a watch.
Final Thoughts
Photographing the Milky Way Arch is both technically challenging and incredibly rewarding. It requires patience, planning, and a willingness to stand in the cold for hours! But the final result is always worth it.
If you’d like to join me on an astrophotography adventure, learn hands-on techniques, or have any questions about this guide, feel free to get in touch! I occasionally organise astrophotography outings, and it would be great to share the experience with fellow enthusiasts.
Let’s capture the night sky together—happy shooting!
Other Images from this adventure
How to get here
Enter your starting location on the box provided under the map to see the route from your starting location to Burton Dasset
Recent Photography Adventures
Why not read about some of my other photography adventures around the UK